

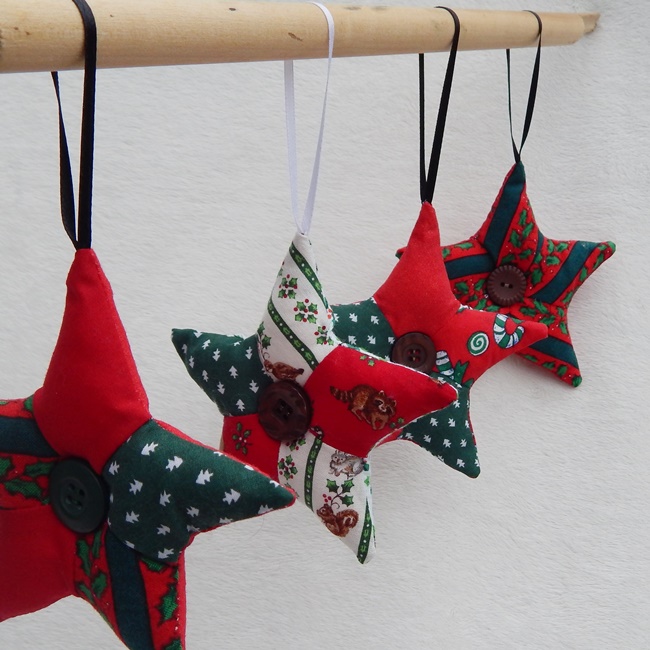
Patchwork Stars for Christmas
2017 Dec 4th
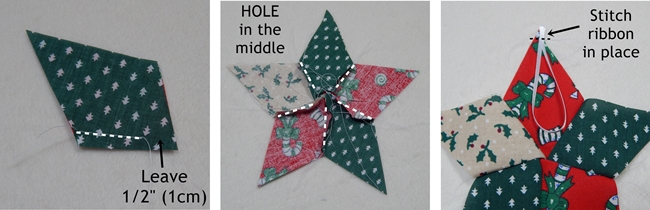
- Place two of the patchwork pieces right sides together. Stitch as shown with 1/4" seam allowance, The longer points of the diamond will make the outside of the star, so be sure you are stitching the SHORT sides together. LEAVE A 1/2" GAP CLOSEST TO THE SHORT POINT OF THE DIAMOND.
- Stitch the next pieces of patchwork to the previous one in the same manner. When all five pieces have been sewn together, attach the last one to the first one, creating the star shape. There will be a hole in the center from the gaps you left when stitching each piece together. This is important as it will be where you stuff the star later on.
- Turn the patchwork start right side up. Cut a length of narrow ribbon approximately 5"-6" long (I used 1/8" wide satin ribbon). Fold the ribbon in half to create a loop. Place it so that the ends meet at one point of the start, and baste stitch in place (this is just to keep it from sliding around) approximately 1/4" from the tip of the star point.
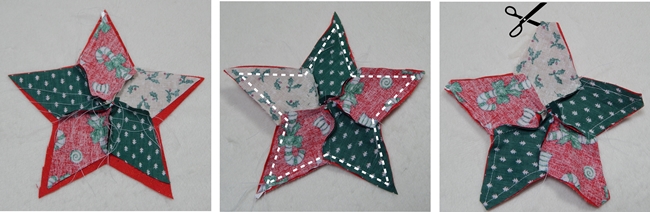
- Put the patchwork star right sides together with the back star piece. If they don't match up perfectly, don't worry about it. It's tricky to get it perfect with this narrow seam allowance and the bulk of the seams so close together at the center. Line it up as best you can, and you can flatten/stretch it more as you stitch to make the edges line up.
- Stitch ALL the way around the star, with 1/4" seam allowance. Stop at each turn, lift the presser foot, and turn the fabric to make a nice crisp angle. When you get the point with the ribbon, you can make the seam allowance there a little bit wider to make it easier to get over the point. You won't notice it when it is right side out.
- Cut off the tips of each point, being careful not to cut through your stitching. You may also want to snip carefully in the seam allowance at each inside angle as well to make the star turn right side out as neatly as possible.
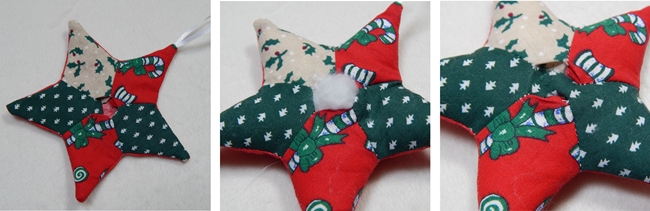
- Turn right side out through the hole at the center of the patchwork. Use a blunt tool of some kind to help push the points out as cleanly as possible (a large knitting needle or a chop stick work great!).
- Stuff inside the start with polyfil. Use the same tool as the previous step to help push the stuffing as far into the points as you can.
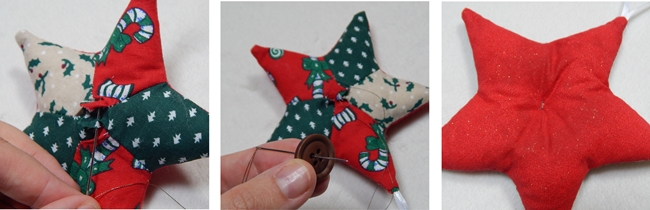
- When stuffed to your satisfaction, Pull the raw edges of fabric at the center hole so that you can see them.
- With a needle and thread, grab the fabric of each piece of patchwork at the center of the star. Just put the needle through each piece once so that they are all brought to the very middle. This doesn't have to be pretty as the whole will be covered by the button!
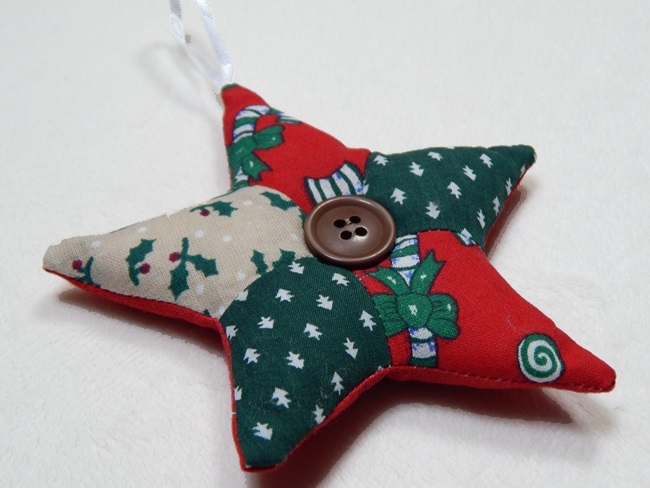
- Using the same thread, begin to stitch on your chosen button. I liked to use 3/4" buttons on the smaller stars, and 1" buttons on the larger stars. I don't suggest smaller or you might see some of the hole under the button, but feel free to use a larger button if you like the look!
- Stitch the button on tightly right over the hole. Stitch all the way through to the back of the star, being as neat as possible on the backside.
Here at Pollywoggles we are counting down 'till Christmas and as of today there are only three more weeks to go! If your fabric stash looks anything like mine, this time of year is when you start to realize how much scrap Christmas fabric you have... and start wondering what to do with it. Here is a simple project to use up a whole bunch of small pieces and make a unique handmade gift or decoration at the same time.

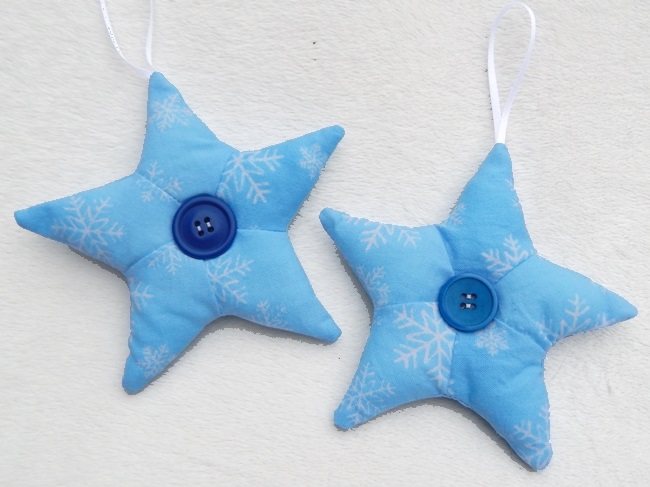
I love these as a unique bunting hung from around our living and dining room with twine and using those little tiny clothespins that you can pick up at craft or dollar stores (look in the scrapbooking section). They are also cute hung on your tree, or used as gift toppers in place of tags.
These stars take about 10-15minutes to complete if you do them one at a time, but can be done faster if you make a bunch "assembly line" style. Cutting the patchwork pieces in bulk is a breeze with a rotary cutter and cutting mat, and it's so addicting you might find that you quickly end up with more pieces than you planned!
All you need for this project is:
Scraps of fabric suitable for your chosen star.
Small piece of narrow ribbon
Polyfil for stuffing
1 button, approximately 3/4" - 1" in diameter
Needle & thread
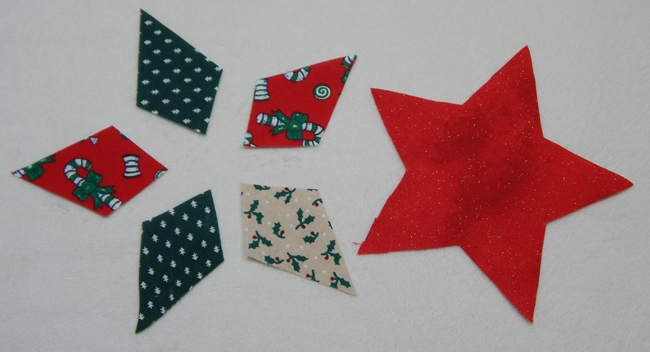
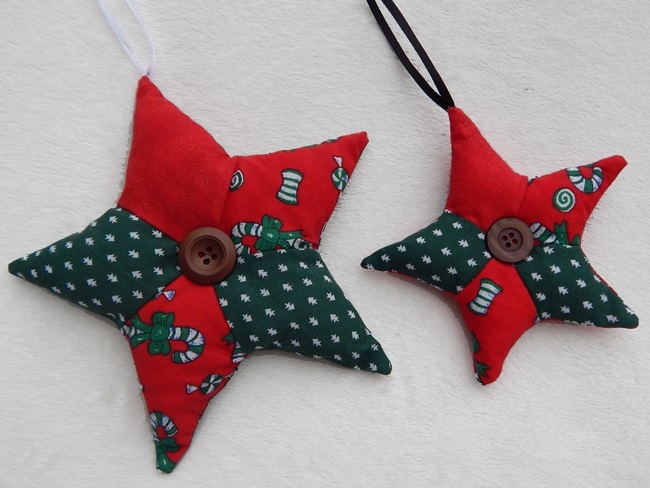
Choose which star size you would like to make. The larger star is approximately 7" across, and the smaller star is approximately 5" across.
Using the template (PDF download available below), cut five pieces for the patchwork side of the star. Cut 1 star piece for the back.
Hopefully, now that you've done one, you're ready to cut out a bunch more and get stitching! I found these surprisingly addicting to make. I thought I was done after about a dozen, but found myself cutting out more a few days later. All together, I think I made about thirty of them!
Happy Christmas Scrap-busting!
